|
|
|
Now that we know how to import the animations we'll work on moving your character within the scene by applying the animation to a path.This tutorial assumes you are familiar with the Poser animation to Bryce tutorial.
|
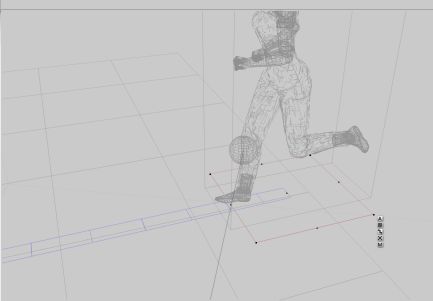
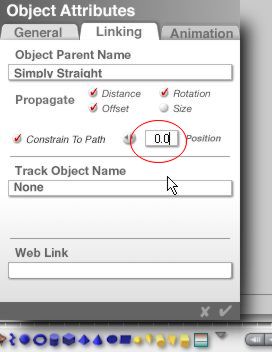
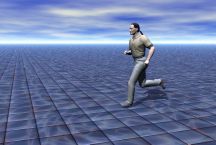
Step 1 : Create a path upon which your character will move along. (In this case I just used a straight path to simplify it). Create a 2D square and rotate it 90 dergrees, go into attributes: linking tab and constrain it to the path. Set the start position to where you want your character to start (normally 0.0-the beginning of the path). (NOTE: in this scene I used a hidden sphere for the camera to track since I couldn't use the poser figure as I will be deleteing it each frame. Using the 2D square makes the camera point to low) Either writing it down or like I do, use a laptop with wordpad or something and write down the X,Y,Z coordinates for the 2D square. The square will be our guide for placement of our figure. Making sure the time scrubber is set to frame 0. Import Object frame 0, keeping the box with the figure (that we wrapped around our figure in Poser) input in the attributes the position of the 2D square. The Y coordinate will be the Y coord of the 2D square + ½ the Y size of the figure, otherwise ½ your figure will be in the ground. |
|
|---|---|
|
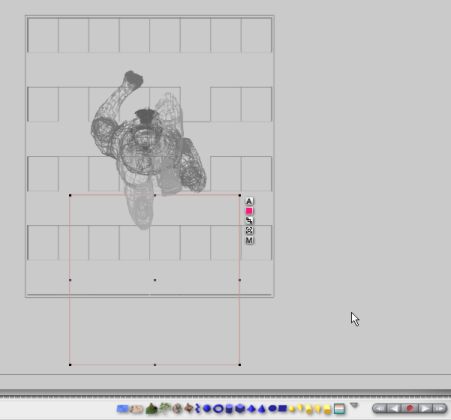
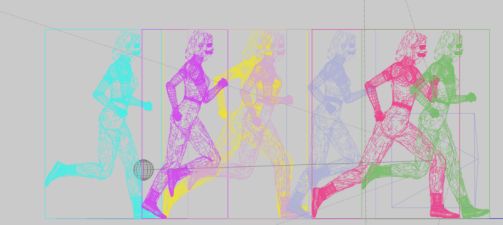
Step 2 : Now we'll setup how far the figure will move along the path. Since this is a 30 frame animation I decided to use every 5 frames to sets keyframes along the path. Moving the scrubber to frame 5, import Object frame 5and using Object frame 0 as a reference move Object frame 5 until it's placed properly. Select both the figure and 2D square, go to solo mode and top down camera. Now I like to select just the figure and mark the center with my finger then select 2D square and move it until the center of the square matches the center of the figure. If you have autokey off set a keyframe. Continue to do this for frames 10,15,20,25,29 (0-29 is 30 frames). When you are done you should have something similar to the bottom picture (colored for clarity). |
|
|
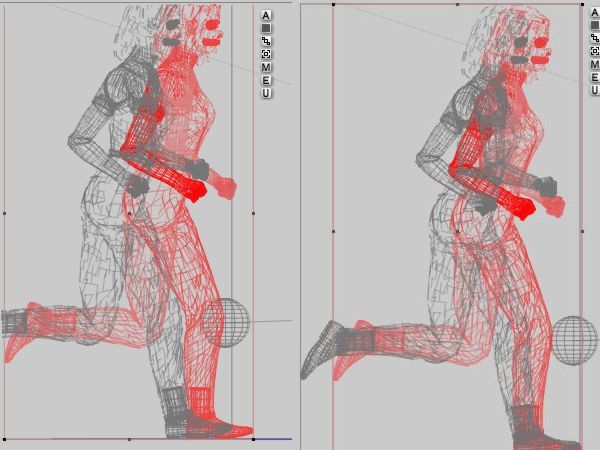
Step 3 : Move the scrubber back to frame 0 and delete all Object frames except frame 0. Delete the box around the figure and follow the steps in the Poser animation to Bryce Part 2 Tutorial with exception you want to leave the last frame's figure there for reference for this frame's figure. You will notice with some frames the figure may not match perfectly, simply move the figure back or forward to place it right then delete the last frame's figure and the box around this frame's figure. |
|
|
Step 4 : If you wish the sequence to repeat follow this. Make sure the path is long enough to begin with to hold the whole length of the animation, it will make things easier instead of find out that you get to the end and have run out of room. Then you would have to start all over since just changing the size of the path will change how far the 2D face will move along it per frame (the 2D face moves a percentage of the path per frame not an absolute world distance). Assuming the path is long enough, during Step 2 note the 2D square's postion at each keyframe. When you get to frame 29 which should be 1 sequence advance the scrubber to the next frame (1:00), load Object frame 0 again and line it up with Object frame 29 so it's placed correctly. Align the 2D face with Object frame 0's position and note the new postion along the path (pictured right). This will form the base postion for the nexr sequence. Repeat what you did in Step 2 except you shouldn't have to load the objects to set the keyframes just change the position of the 2D square along the path by using the positions that you noted above and add the new base position to it to get the new position. (Example frame 5 position 12.5; frame 1:00 is 51.3(new base); frame 1:05 will equal 12.5+51.3 or 63.8). |
|
|
Sample AVI (2189 kb) There's some jumpiness in it because of some mistakes I've made but it get's the idea across. |
|
Continue to Part 2 of the Animation Paths Tutorial : Over Terrains
![]()
![]()
You are
visitor 

 to this page